

Six Days. 62 Kilometers. Zero Certainty.
- salty.peaks.journal

- Apr 7
- 6 min read
Updated: Apr 27
Chasing the Edge on New Zealand’s Abel Tasman Coast

Facing new limits, new goals, new landscapes, new challenges and New Zealand. With only a year's worth of overnight hikes in Australia under my belt, hiking 6 days was something I was even ready for? There really was only one way to tell, go after it. I knew I wanted to test myself, to see if I really could manage six days with only rations, simple shelter and the complete unknown of the trail, the weather and what I might encounter along the way.
Bark Bay Campground
New Zealand is no stranger to Great Walks with 11 total between both the North and South Island, booking onto some of the walks is wait list based and well, I was late to the party with a very last minute trip to New Zealand. The Abel Tasman is considered to be a more entry level or family friendly Great Walk, with less elevation than some others totaling around 2100 meters (6,890 ft) over a distance of around 62km (39 miles).
The walk takes you on a journey though coastal vistas, winding through New Zealand Beach Forests and Sub Tropical pockets, almost no two sections of this trail are the same winding along aquamarine coast lines, huts nestled on beaches and campgrounds under the trees with views out to snow capped mountains across the horizon. This walk might not be as rugged as the Kepler or the Routeburn but it certainly showcases New Zealand's Sub tropical region while providing just enough challenge for anyone looking to take on their first multiday hike in a country where the landscape can be intimidating.


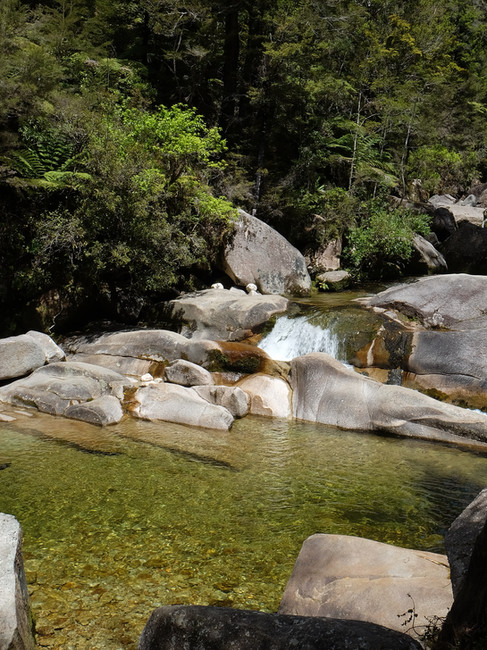
Cleopatra Falls
So how do you even plan to walk 62km with only overnight experience? The longest I had ever walked was 15km in a day and honestly that truly was my upper limit, or so I had thought. Where do you start? The beginning sounds good but it can all become quite overwhelming, there's all the logistics, the distance, the food to carry, the gear, the weight and planning for all the variables.
Best practice I have learned to look over your map and start by plotting a route. So I set to my GPS and came up with what I thought was a solid plan, taking on the trail from the start point in Marahau and ending in Totaranui, not the official end point, with that being a further 8km to Wariwharangi Bay and harder logistics on returning to Marahau I chose to stop at the last point where it was possible to water taxi back.

The route plan took me over 6 days from point to point starting with a shuttle bus from Nelson where I stayed in Bridge Backpackers Hostel, for a sketchy night sleep in top bunks with no rails...I wasn’t sure if I was even going to make it to the trail head before falling out the top bunk. The plan had been gentle distances, gradually increasing over the course of the week as the pack allegedly became lighter. Starting with 5k and building to what I had hoped would be 14k at tops. However best laid plans, as some of the differences were, well quite different. Getting to a point where you have a plan can take some time and I found the fastest way to do that was to build an itinerary for the trip.
Focusing on a rough agenda, logistics, day by day distances, challenges and dependencies, packing check list, gear guide with weights and a day by day meal break down. With a cost breakdown at the end with a booking reference check box to make sure all bases were covered and booked upon departure. The trip would start in Wellington, New Zealand's capital, taking the Ferry across the Cook Straight to Picton. From Picton it's a booked bus out to Nelson where I spent a night pre and post hike at Bridge Backpackers.
Day One: Mārahau Trail Head - Apple Tree Bay Campsite
Planned Kilometers: 5.4km
Actual Kilometers: 8.4km
Day Two and Day Three: Apple Tree Bay - Observation Beach Campsite
Planned Kilometers: 3.8km
Actual Kilometers: 7.2km
Day Four: Observation Beach Campsite Night 2 - Side Quest to Cleopatra's Pool
Planned Kilometers: 3.5km
Actual Kilometers: 14km
Day Four: Observation Beach Campground - Bark Bay Campsite
Planned Kilometers: 14km
Actual Kilometers: 18km
Day Five: Bark Bay Campsite - Awaroa Campsite
Planned Kilometers: 12.7km
Actual Kilometers: 17km
Day Six: Awaroa Campsite - Toraranui Beach Campsite
Planned Kilometers: 6.9km
Actual Kilometers: 9.7km


Once you know where your feet are going to take you well then the fun part comes in - the gear and food. Being on a tight budget meant choosing to stick with my 52l backpack and work with the space I had for the next 6 days with no questions asked. Sometimes you gotta wing it a little. Picking gear for this trip was more tricky, with South Island hiking planned my gear needed to cover two bases.
Gear List
Backpack:
Macpac 52l Voltra Veted
Sleep System:
Sleeping Bag: Sea to Summit Women's Hamelin -1
Mat: Alton Goods R4
Pillow: Mountain Designs Air Lite Pillow
Tent: North Facestorm Break 1
Cook System:
Billy: Path finder
Stove System: Mountain warehouse mini stove attachment
Gas - 100g
Water Bladder: Sea to Summit 6l bladder
2 Sea to Summit Collapsible Cups
Sea to summit spoon
Sawyer Squeeze Mini
Food:
6 Supreme Coffee Parachutes
4-5 Herbal Teas
7 Instant oats
6 Musili Bars
Crackers
Salami
Whole slab of parmesan cheese
4 pack of peanuts
1 Dehydrated hummus by Campers Pantry
4 Dehydrated meals by Campers Panty
2 Dehydrated meals by Radix - higher calorie
2 Fruit juice pouches
1 Pack of lolly snakes

Clothing:
Macpac Merion Wool Benne and Gloves (These were two things I never actually used)
Macpac Sun Cap
1 Sports
1 Bike Shorts
1 Mernio T-shirt
1 Macpac Sun Shirt (AKA the everything shirt, this thing was my sun shirt, my towel, my hair wrap, my beach mat. You name it! Because it dry's so fast it was pretty useful and I never bought a towel so had to make do.
1 Macpac Convertible Pants (I almost didn’t bring these but thank god I did for the sand-flies every waking hour of the day)
1 Macpac Nitro Fleece i
1 Macpac 220 Merino Base Layer Long Sleeve
1 Macpac 180 Merino Base Layer Long Johns
1 Traverse 20,000 HH Rain jacket (that I never actually used till I got of the Cook Straight ferry and back into Wellington)
1 Uber Light Down Puffer Jacket (again I only used this on the outbound and inbound ferry to and from Wellington)
6 Pairs of Merino Socks
8 Pairs of undies
1 Bikini
1 Pair of thongs as camp shoes (really glad I did this, usually I was barefoot but when those blisters kicked in keeping them covered but out of my boots was so comforting)
So now I had everything mapped out, the route was planned, food was organized, and all my logistics were organized. So what do you do with all the information, well for me being organized is so key to a successful trip.
Being someone that is likely to lose or forget dates for things like ferry connections, I set out to collect all the information and make a word document breaking down logistics, connections, accommodations, route plan, food and a packing list all in one place added connect numbers of local emergency services and set it to my next of kin ready for me to set out for the next six days on foot.

In conclusion, considering this was my first multi day hike and I started at the top end with six full days, things went surprisingly well. There was nothing forgotten thanks to my check list I made as part of my logistics plan, the only thing I will say I learned was that because I had chosen to camp the whole way to save money on the hut fees it meant that I was cooking outside every night and morning without a cooking shelter, and while the weather was good the whole time the wind did get up making fuel consumption was higher with my stove meaning I actually ran out of gas by day three and never bought a back up.
Thankfully as trail magic usually goes, I was lucky enough to spend my third night at Observation Beach with one other camper who was on her last day and looking to off load some gear, mainly a canister of gas that got me through to the end. I learned that mapping on signs in New Zealand is usually very varied and some distances might actually be a lot longer than you planned. In future I would aim to do less distance as likely it will end up being more than you planned with elevation and typography changes.
Choosing lighter would have been nice because also being on a budget meant that I had to get gear that was heavier than I wanted and it also needed to cover two different climates where possible. Don’t forget to keep your eyes open for those Wekas.


Article written by Francesca Solloway. For more follow salty.peaks.journal on her Instagram.


